Choosing the best Drive-in Storage facility is not only a price comparison. It is a practical decision about access, safety, capacity, and daily convenience. A suitable unit should match the vehicle, goods, loading routine, and expected storage period.
The Self Storage Association’s 2023 Demand Study estimated that about 14.5 million U.S. households used self-storage. That figure reflects continuing demand for flexible space. However, demand alone does not prove that every facility performs well. Location still matters. A narrow entrance can turn a simple delivery into a stressful maneuver. Poor lighting can make evening access uncomfortable. A low monthly rate may also hide limited hours, weak security, or difficult loading conditions.
Industry research supports a more disciplined evaluation. CBRE’s 2024 Global Industrial & Logistics Occupier Survey highlights operational efficiency, labor pressure, and supply-chain reliability as major business concerns. These issues also affect storage users. A drive-in layout can reduce carrying distance, protect goods from rain, and save handling time. It may not suit every item, though. Temperature-sensitive products, oversized equipment, or fragile inventory may require specialized controls.
This guide presents seven practical tips for comparing Drive-in Storage options. It considers access height, vehicle clearance, unit dimensions, security systems, insurance, ventilation, and contract terms. The checklist is useful, but it is not perfect. Real conditions can differ from brochures. Visit the site when possible. Measure your vehicle and largest item before signing. Small oversights often create the biggest costs.
7 Tips for Choosing the Best Drive-In Storage
Understanding Drive-In Storage and Its Main Benefits
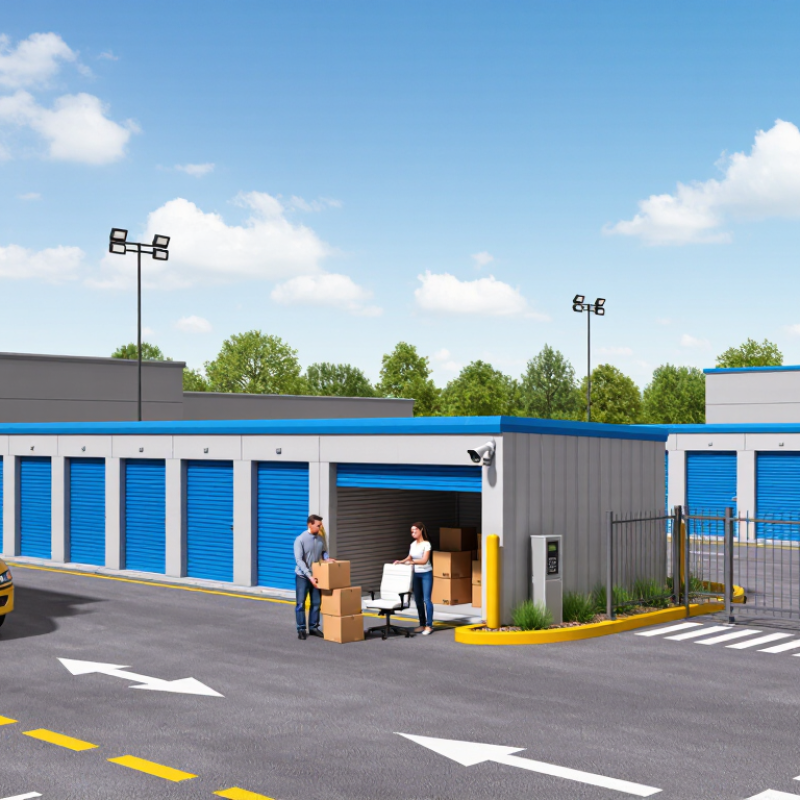
Drive-in storage lets you drive directly to your rented unit. This design reduces carrying distance and makes bulky items easier to move. It works well for furniture, business stock, tools, and seasonal equipment. A covered loading area also protects belongings from harsh sun and sudden rain. Less exposure can mean fewer damaged boxes.
A suitable facility should have wide lanes, clear height limits, and smooth turning space. Check these details with your actual vehicle, not a showroom example. Look for bright lighting, controlled entry, cameras, and functioning fire protection. Clean corridors matter too. Dust, leaks, and standing water can reveal poor maintenance. Ask about access hours, insurance requirements, payment terms, and notice periods before signing.
Measure your vehicle and largest items carefully. A few centimeters can change the experience. During a visit, open the doors and test the route to the unit. That small test often exposes awkward corners. I have found that convenience can encourage overpacking, which makes later access frustrating. Temperature control may also be limited in drive-in spaces, so sensitive items need suitable packaging. Staff knowledge is another practical signal; clear answers usually indicate reliable operations. Still, polished appearances can mislead, so inspect the unit itself.
7 Tips for Choosing the Best Drive-in Storage
Assessing your space, access, and vehicle storage needs prevents expensive surprises.
Tip 1: Measure your vehicle, including mirrors, roof racks, and open doors. Leave extra clearance for turning.
Tip 2: Study the entrance width and ceiling height. A tight gate can make daily visits frustrating.
Tip 3: Check the driving surface after rain. Pooled water may damage tires, tools, or stored equipment.
Tip 4: Match the unit size to your actual routine. A little walking space helps when loading boxes or checking your vehicle.
Tip 5: Ask about access hours and lighting. Visit the facility during your usual travel time, not only in daylight.
Tip 6: Inspect security details personally, including gates, cameras, fencing, and staff presence. Security claims should be clear and verifiable.
Tip 7: Consider your vehicle’s condition and storage duration. Long-term parking may require ventilation, battery care, tire checks, and protective covers.
I once underestimated turning space in a narrow unit, and reversing took several attempts. That mistake changed how I assess storage layouts. Ask about insurance requirements, maintenance rules, and emergency procedures. Read every agreement carefully. A convenient location may still fail if access feels awkward or the unit cannot handle your vehicle comfortably.
7 Tips for Choosing the Best Drive-in Storage
Measure your largest item before comparing unit sizes. A narrow unit may fit boxes but leave no turning space. Leave at least 30 centimeters for safe movement around stored items. Tall shelving can double usable capacity, but check the ceiling height first. A slightly larger unit often prevents damaging furniture during loading. I once chose a tight space and regretted it.
Study the layout during a real visit, not only through photographs. Wide lanes make reversing easier, especially with a trailer or moving van. Check whether doors open fully without blocking nearby units. Look for level floors, clear signs, and enough lighting near each entrance. A drive-up door saves effort, but poor drainage can create trouble after heavy rain. Small details matter.
Visit at the time you expect to load or unload. Observe traffic, gate queues, and vehicle access. Ask about access hours, temporary parking, and rules for larger vehicles. Confirm whether the route includes sharp corners or low clearance points. Test the keypad and inspect the walking distance from parking areas. Staff should explain security procedures clearly and provide written terms. Do not ignore an inconvenient layout. Convenience is part of the storage cost. Some advice online sounds certain, yet every facility behaves differently. Your own inspection may reveal the better choice.
A secure drive-in facility should feel controlled, not merely convenient. During a site visit, I check gated access, visitor logs, lighting, camera coverage, and emergency communication. Cameras need clear views of doors and vehicle lanes. The 2023 NFPA U.S. Fire Loss report recorded 1.39 million fires and about $21.9 billion in property damage. Ask for documented alarm testing, electrical inspections, sprinkler servicing, and evacuation procedures. A polished gate proves little.
Climate control also needs evidence. Look for temperature and humidity logs, sealed doors, insulated roofs, and functioning drainage around loading areas. ASHRAE Handbook guidance can help assess ventilation and HVAC design, although storage needs vary by material. NOAA recorded 28 billion-dollar weather disasters in the United States during 2023. Flood-resistant access routes and raised electrical equipment therefore deserve practical attention, especially in low-lying locations.
Maintenance standards reveal daily discipline. Request inspection schedules for doors, ramps, lighting, pest control, fire equipment, and HVAC filters. Check whether problems receive dated work orders and follow-up verification. I prefer facilities that explain failures honestly. Perfect records may be unrealistic. Missing records are worse. ISO 31000’s risk-management approach supports regular hazard reviews, not one-time promises. Before signing, visit after rain, test access at night, and ask who responds when systems fail. That answer matters.
Tip 1: Compare the total monthly price, not the advertised rate. Ask about administration fees, deposits, locks, access charges, and future increases. The 2023 Self Storage Association Demand Study reported 16.7 million U.S. households rented storage. High demand can make introductory prices misleading. Tip 2: Request a written price schedule. Tip 3: Check whether climate control costs extra.
Tip 4: Read the contract before moving one box. Look for notice periods, automatic renewal, late-payment charges, access hours, and auction procedures. State rules differ, so reliable operators should explain them clearly. Tip 5: Ask how often rates may change. Yardi Matrix’s 2024 self-storage reports tracked continuing pressure on asking rents in several major markets. That trend may help renters negotiate, but it does not guarantee a fixed price.
Tip 6: Review insurance carefully. The Insurance Information Institute notes that homeowners policies commonly limit off-premises belongings to about 10% of personal property coverage. Storage protection may exclude water damage, pests, electronics, or unexplained loss. Get exclusions in writing. Tip 7: Test customer policies before signing. Ask who handles emergencies, how access records are kept, and how complaints are escalated. I once focused too heavily on price and overlooked limited weekend access. That mistake made simple retrievals frustrating. A clean facility matters, but responsive staff matter too. Some policies look reasonable until you need them.
Use this practical checklist to compare facilities before signing a storage contract. The chart shows a suggested 100-point evaluation framework rather than company-specific data.
How to use it: Compare at least three facilities using the same criteria. Review the full monthly price, access rules, notice period, late fees, renewal terms, insurance requirements, security measures, and cancellation policy. Give each facility a score from 1 to 5, then apply the suggested weighting shown above.
Measure your largest item before visiting. Leave about 30 centimeters for safe movement. A slightly larger unit may protect furniture from damage. Tight spaces can create regret.
Wide lanes make reversing easier. Check turning space for vans or trailers. Doors should open fully without blocking nearby units. Small details matter.
Look for level floors, bright lighting, clear signs, and clean entrances. Check drainage near drive-up doors. Poor drainage can cause problems after heavy rain.
Visit during your usual loading time. Observe traffic, gate queues, and available parking. Try the keypad and walk from parking areas. Night visits may reveal weak lighting.
Ask about access hours, temporary parking, and larger vehicles. Confirm sharp corners and low clearance points. A convenient route saves time repeatedly.
Check gated access, visitor records, lighting, and camera coverage. Cameras should clearly view doors and vehicle lanes. Ask how emergencies are communicated.
Look for temperature and humidity records. Inspect sealed doors, insulated roofs, and working drainage. Climate needs vary by stored material. Claims alone are not enough.
Request inspection schedules for doors, ramps, lights, pest control, fire equipment, and ventilation systems. Ask for dated repair records. Perfect records are rare. Missing records are worse.
Ask who responds when access, alarms, drainage, or climate systems fail. Request clear written terms and security procedures. Visit after rain if possible. That answer matters.
Choosing the right Drive-in Storage facility starts with understanding how this format works. It allows you to drive directly to or near your unit, making it convenient for storing vehicles, equipment, furniture, or bulky belongings. Begin by assessing your available space, how often you need access, and the type and size of items you plan to store. Compare unit dimensions, layouts, turning space, loading areas, operating hours, and overall facility accessibility to ensure the setup matches your needs.
You should also evaluate practical standards such as lighting, surveillance, entry controls, cleanliness, drainage, climate control, and routine maintenance. Before signing an agreement, review the total price, deposits, contract length, payment terms, insurance requirements, and policies for access, cancellations, and late payments. A suitable facility should offer a clear agreement, reliable security, convenient access, and a well-maintained environment that provides good value over time.

Shibang Rack